Windows 10
● 可透過手動設定或是下載快速設定檔(下載點)進行設定
You can configure the connection manually or download the quick setup file.
快速設定說明:
Quick Setup:
-
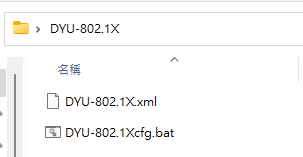
將檔案解壓縮後,執行快速設定檔「DYU-802.1Xcfg.bat」。
Extract the downloaded file and run "DYU-802.1Xcfg.bat."
-
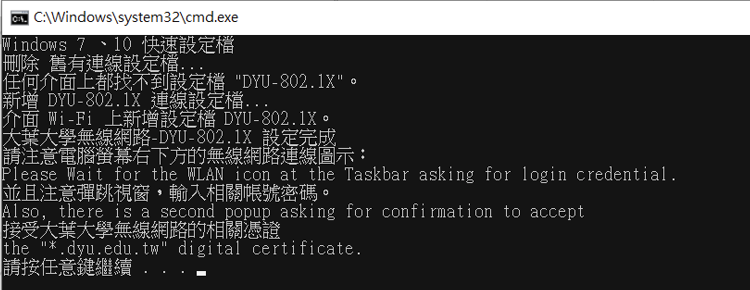
快速設定檔會新增「DYU-802.1X」設定檔。
The quick setup file will create a "DYU-802.1X" wireless network profile.
-
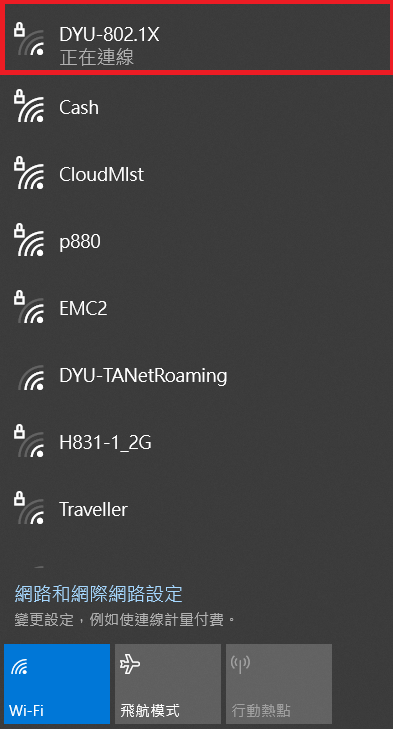
新增「DYU-802.1X」設定檔後,點選「DYU-802.1X」進行連線。
After the "DYU-802.1X" profile is created, select "DYU-802.1X" to connect.
-
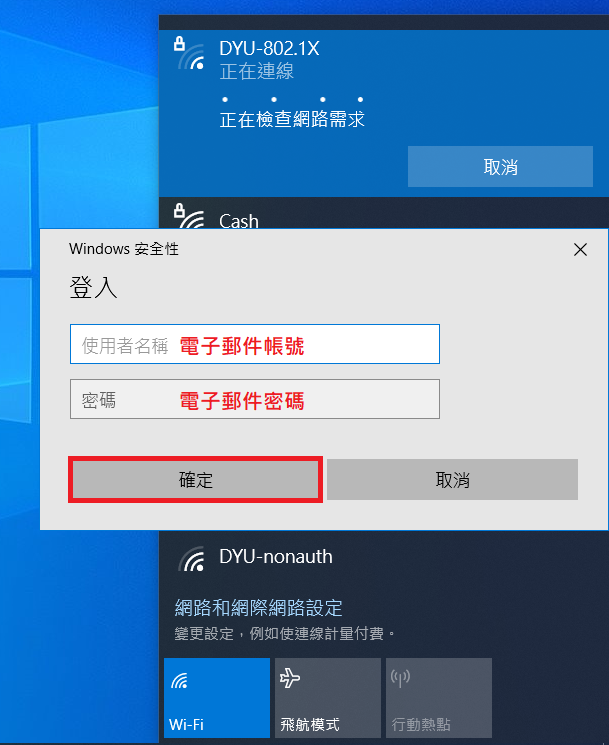
輸入以下資訊:
Enter the following information:
-
使用者名稱:電子郵件帳號(請輸入電子郵件地址中「@」之前的帳號名稱)
Username:Email username(Enter the account name before the "@" symbol in your email address.)
-
密碼:電子郵件密碼
Password:Your email password.
輸入完成後,點選「確定」。
After entering the information, click "OK."
-
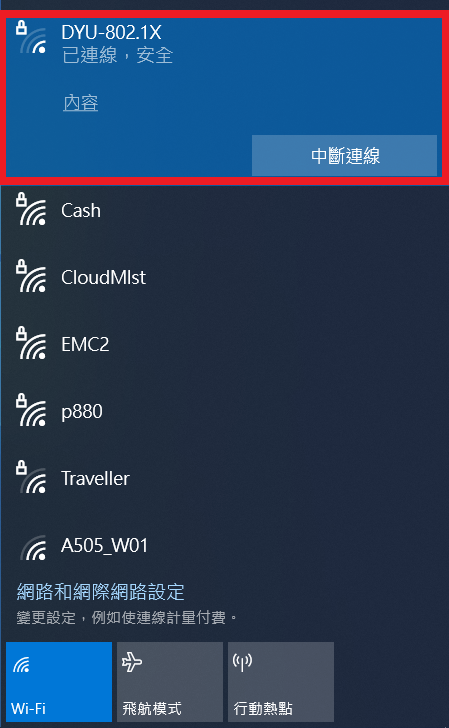
完成連線。
The Wi-Fi connection is complete.
手動設定說明:
Manual Setup:
-
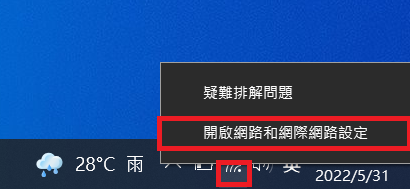
於桌面右下角網路圖示按右鍵,選擇「開啟網路和網際網路設定」。
Right-click the network icon in the lower-right corner of the desktop and select "Open Network & Internet settings."
-
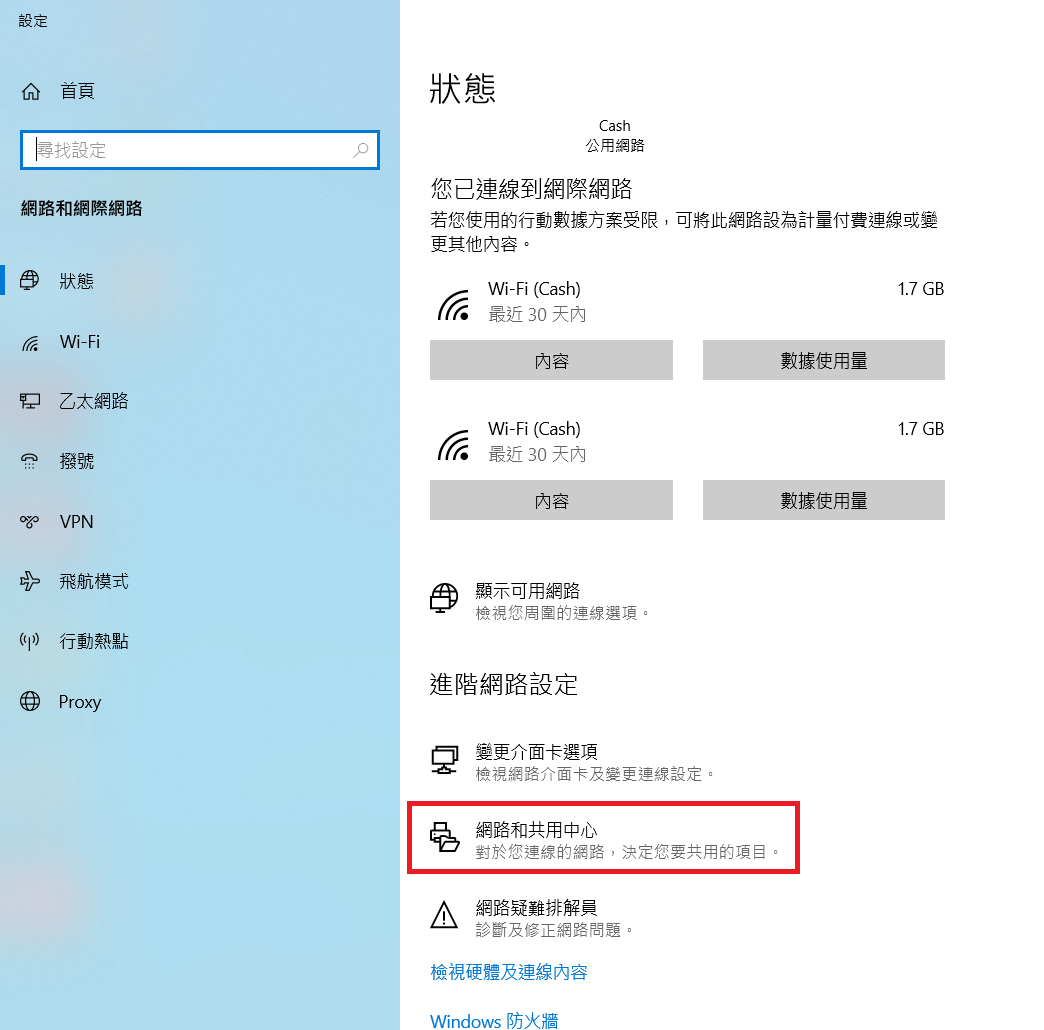
點選「網路和共用中心」。
Click "Open Network & Internet settings."
-
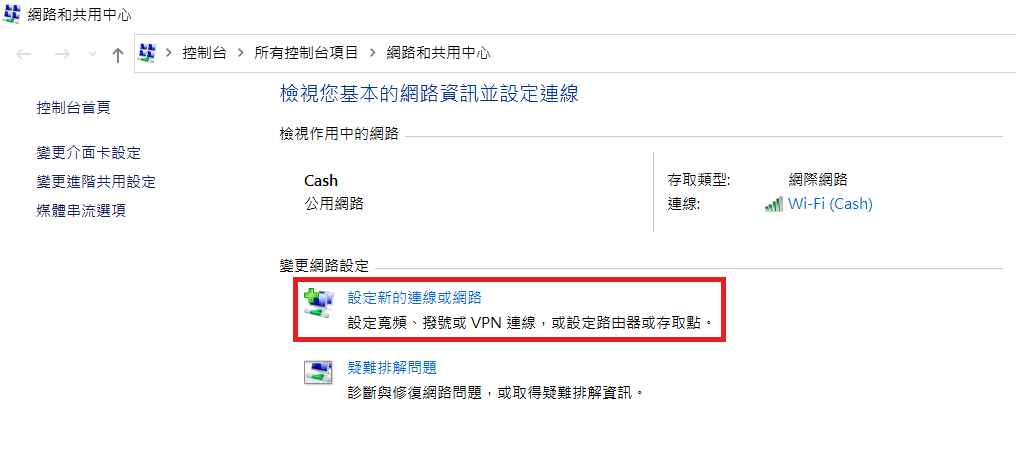
點選「設定新的連線或網路」。
Click "Set up a new connection or network."
-
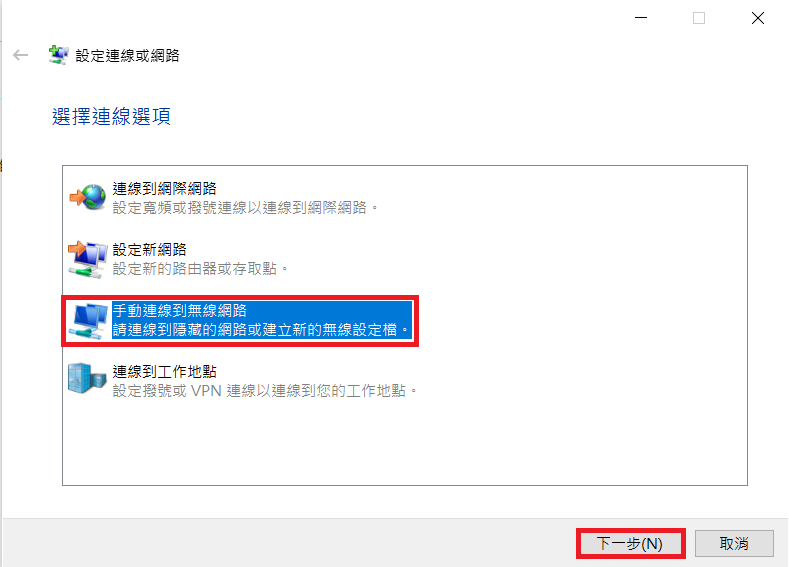
點選「手動連線到無線網路」,再點選「下一步」。
Select "Manually connect to a wireless network", then click "Next."
-
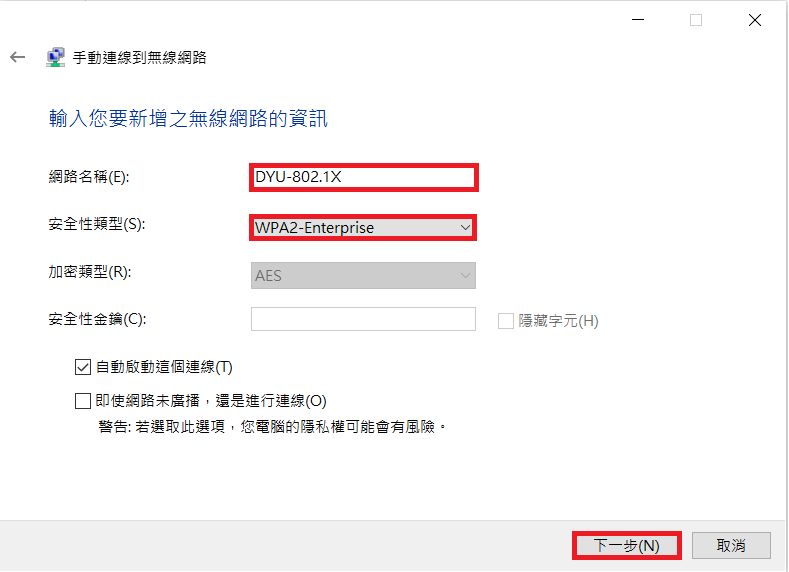
輸入及選擇以下資訊:
-
網路名稱(Network name):DYU-802.1X
-
安全性類型(Security type):WPA2-Enterprise
完成後點選「下一步」。
After entering the information, click "Next."
-
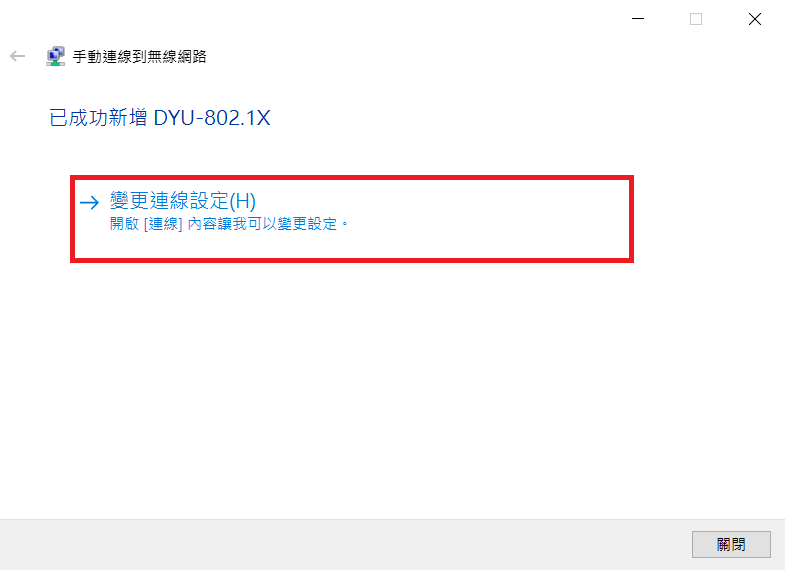
點選「變更連線設定」。
Click "Change connection settings."
-
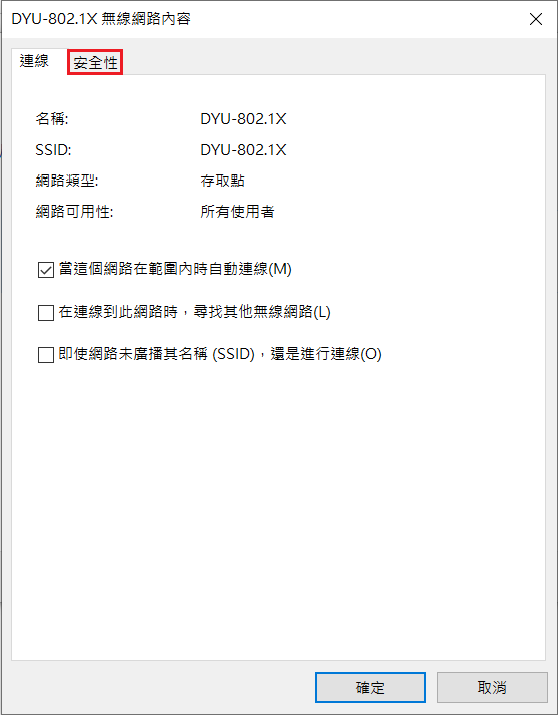
點選「安全性」。
Click the "Security."
-
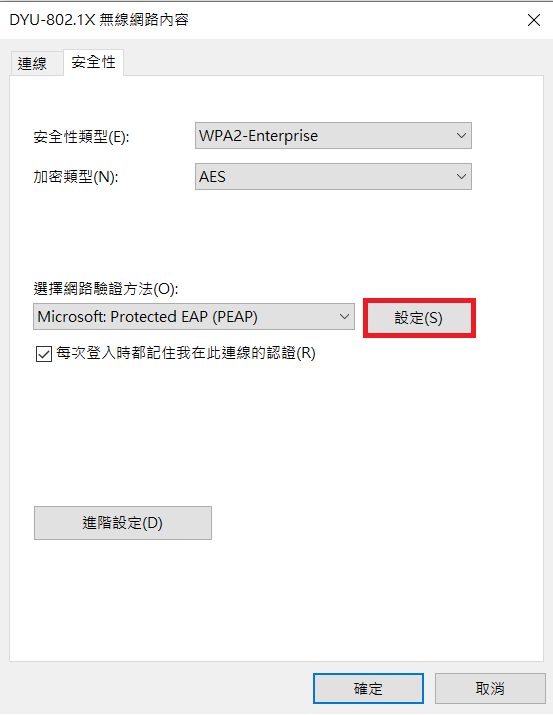
點選「設定」。
Click "Settings."
-
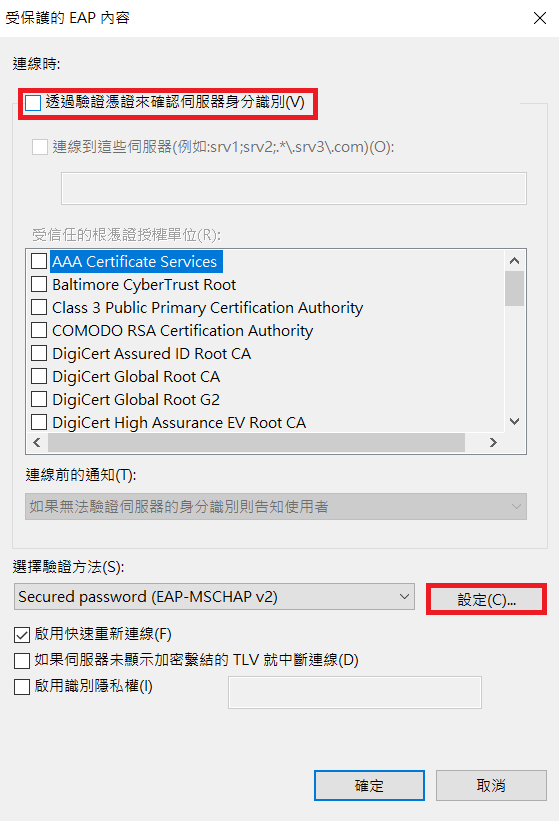
取消勾選「透過驗證憑證來確認伺服器身分識別」,再點選下方「設定」。
Clear the checkbox for "Verify the server's identity by validating the certificate", then click "Settings."
-
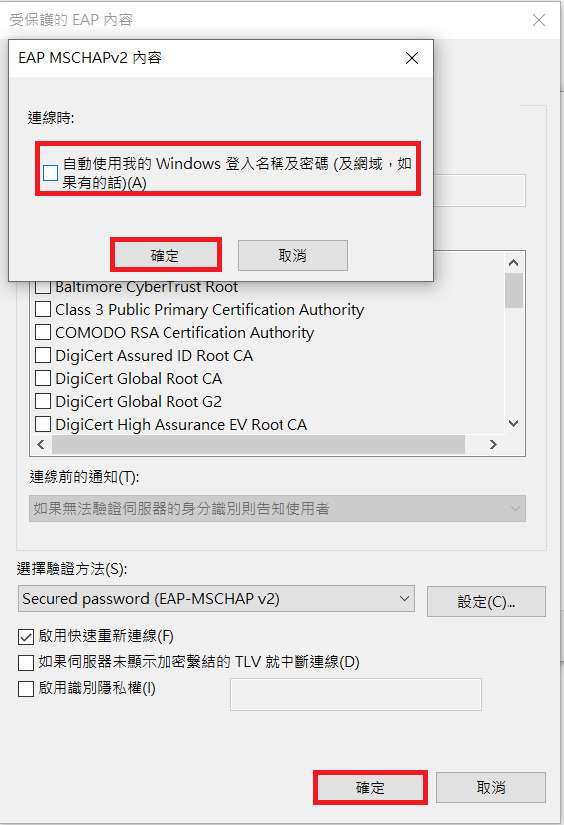
取消勾選「自動使用我的 Windows 登入名稱及密碼」,點選下方「確定」,再點選下方「確定」。
Clear the checkbox for "Automatically use my Windows logon name and password", then click "OK" and "OK" again.
-
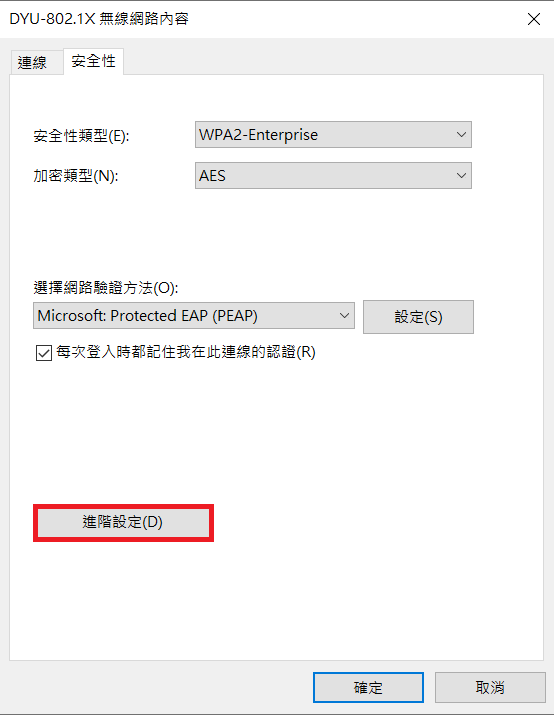
點選「進階設定」。
Click "Advanced Settings."
-
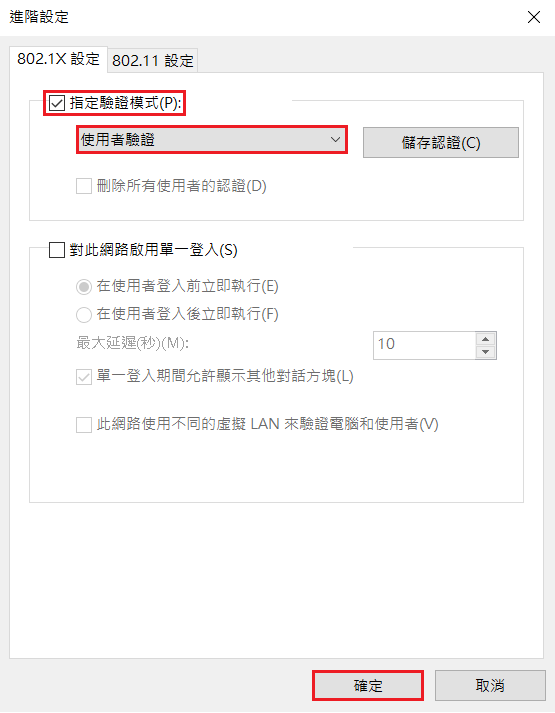
點選「指定驗證模式」,將選單調整為「使用者驗證」,再點選「確定」。
Select "Specify authentication mode", set the authentication mode to "User authentication", and click "OK."
-
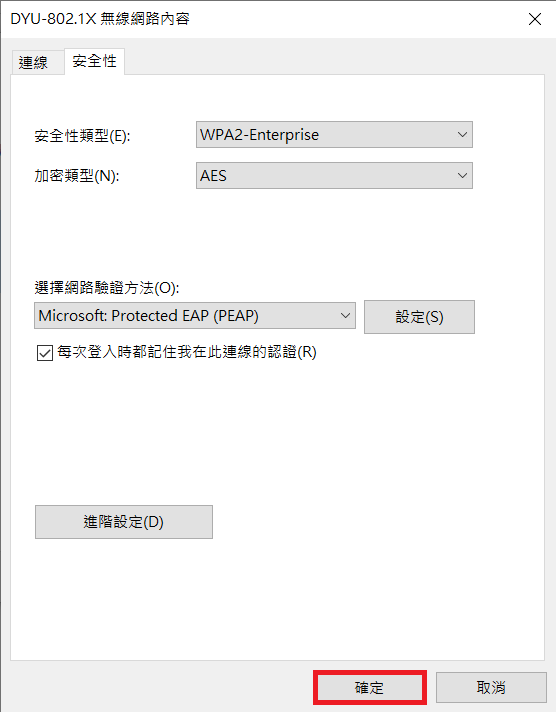
點選「確定」。
click "OK."
-
完成 DYU-802.1X 設定後,點選「DYU-802.1X」進行連線。
After completing the DYU-802.1X configuration, select "DYU-802.1X" to connect.
-
輸入以下資訊:
Enter the following information:
-
使用者名稱:電子郵件帳號(請輸入電子郵件地址中「@」之前的帳號名稱)
Username:Email username(Enter the account name before the "@" symbol in your email address.)
-
密碼:電子郵件密碼
Password:Your email password.
輸入完成後,點選「確定」。
After entering the information, click "OK."
-
完成連線。
The Wi-Fi connection is complete.
|